Thursday, 4 February 2016

Learning To Weave

Tiny enchanting studio in Founders Park


Beginning Weaving
 
 
On a recent holiday in December I visited a wonderful weaving studio, (Twill Hand Weaving Studio), and over a period of two days learned a very little about weaving. The studio was in Founders Park, Nelson, NZ South Island and was an enchanting old fashioned studio full of looms and materials and an excellent weaving teacher.


Full of wonderful materials and samples
 
Looms of all shapes and sizes
 
Beautiful hand made samples
 
 
Even more looms
 
Space for a cup of tea
 
 
And more looms
 
Looms as far as the eye can see


And a really large loom with a room all to itself
 
 
I found the whole experience really exciting and came away feeling that I needed to learn more about this wonderful craft. My first attempts were to weave a simple sample on a loom already warped and ready for use. This sample can be seen below. I concentrated on colours I love - mainly pinks and blues and each of the squares were in different styles and stitches - a real example of what can be done in a very short time.


Beginning weaving
 
Feeling the blues
 
Messy back
 
In the pink
 
My first zig zag
 
 
As you can see I am a true beginner but so wanting to learn. I found three weaving classes in my neighbourhood and was keen to join one but all three have since been dropped due to lack of interest. Very disappointing. Consequently I have spent many happy hours on You Tube learning the basics and now intend to buy a small loom of my own to continue alone with this wonderful craft. Any help or advice would be gratefully received.
 
 
Is there anyone out there, (near London/Surrey borders), who would be willing to teach me?


Wednesday, 3 February 2016

Homemade Lampshades


Elegant Lamps


I just love these lamp bases - a lovely present from Mr Whizz Kid for my birthday. They are antique French brass and very beautiful and we needed equally beautiful shades to go with them.

I ordered some beautiful fabrics from Laura Gunn, (my favourite fabric designer), from the USA and when it arrived tried to make my very first lampshade ever. With the help of hubby - definitely needs two hands - these were the perfect shades to go into our sitting room. With a little left over fabric I made a small cushion cover to go onto an occasional chair in the room.

These are the finished products of which I am so proud.

Ta Dah!


I used a kit from Needcraft and this lovely fabric - all three by the designer Laura Gunn from the Michael Miller Fabric Collection.


Beaded Stripe
Day Lilies
Wing song


Thanks for looking 


Sunday, 31 January 2016

Back To My Happy Place


For All My Family, Friends, Bloggers,
 (And Just The Curious) ...

I Am Back In My Happy Place!

UPDATE: Sadly, my cancer returned and after more major surgery, and months and years of treatment and recuperation, (I have now had cancer four times in four years and have just finished another course of radiotherapy and am feeling fairly well),  I am now back to continue my passion for sewing, knitting, crochet, cooking and travelling, ... and life in general ... and following all the lovely craft blogs out there - I so missed you all.

I intend to "live a little before I die a lot!"

I am back to sewing and knitting, travelling and gardening and have taken a particular interest in cooking. I was not great at cooking cakes in the past as I cook in an Aga, which is generally too hot for cakes. Recently I bought an electric table top cooker just for cakes and it has been a revelation! I have taken plenty of photo's and will bore you all with them over the next few weeks   ...   here are a few to start me off gently ...


P1010769.JPG
My garden is blooming.


P1010784.JPG

The herbs are stunning. 


Flowers1.jpg
The flowers cheer me.

Today I am making a cake - a Magic Custard Cake - it is an easy recipe and has such an unusual taste and is so very delicious. Do try it. It is perfect as a pudding with fruit and lovely on its own with a cup of tea and it keeps well in the fridge.

Ingredients:

1/2 cup (113g) unsalted butter
2 cups (480ml) milk
4 eggs, separated
4 drops white vinegar
1 1/4 cups (150g) icing sugar
1 tablespoon (15ml) water
1 cup (115g) self raising flour
1 teaspoon (5ml) vanilla extract
extra icing sugar for dusting
 
Method:
 
Preheat the oven to 325 f/165 c Lightly butter or grease a 8"x8" baking dish.
Melt the butter and set aside to slightly cool. Warm the milk to lukewarm and set aside.
Whip the egg whites and vinegar to stiff peaks. Set aside.
Beat the egg yolks and sugar until light. Mix in the melted butter and the tablespoon of water for about two minutes or until evenly mixed.
Mix in the flour until evenly mixed. Slowly beat in the milk and vanilla extract until everything is well mixed. It should now look like a fairly thick batter.
Fold in the egg whites, half at a time.
Pour the batter into the prepared pan and bake for 45-60 minutes or until the top is golden. Allow cake to completely cool before cutting and then dust with icing sugar.


This is the cake directly from the oven before sprinkling with icing sugar. It shrinks a little as it cools.


Ta Dah!


PS. Thanks for sticking around!

Wednesday, 13 February 2013

Quick Knit Slippers


Just Like Grandma Made


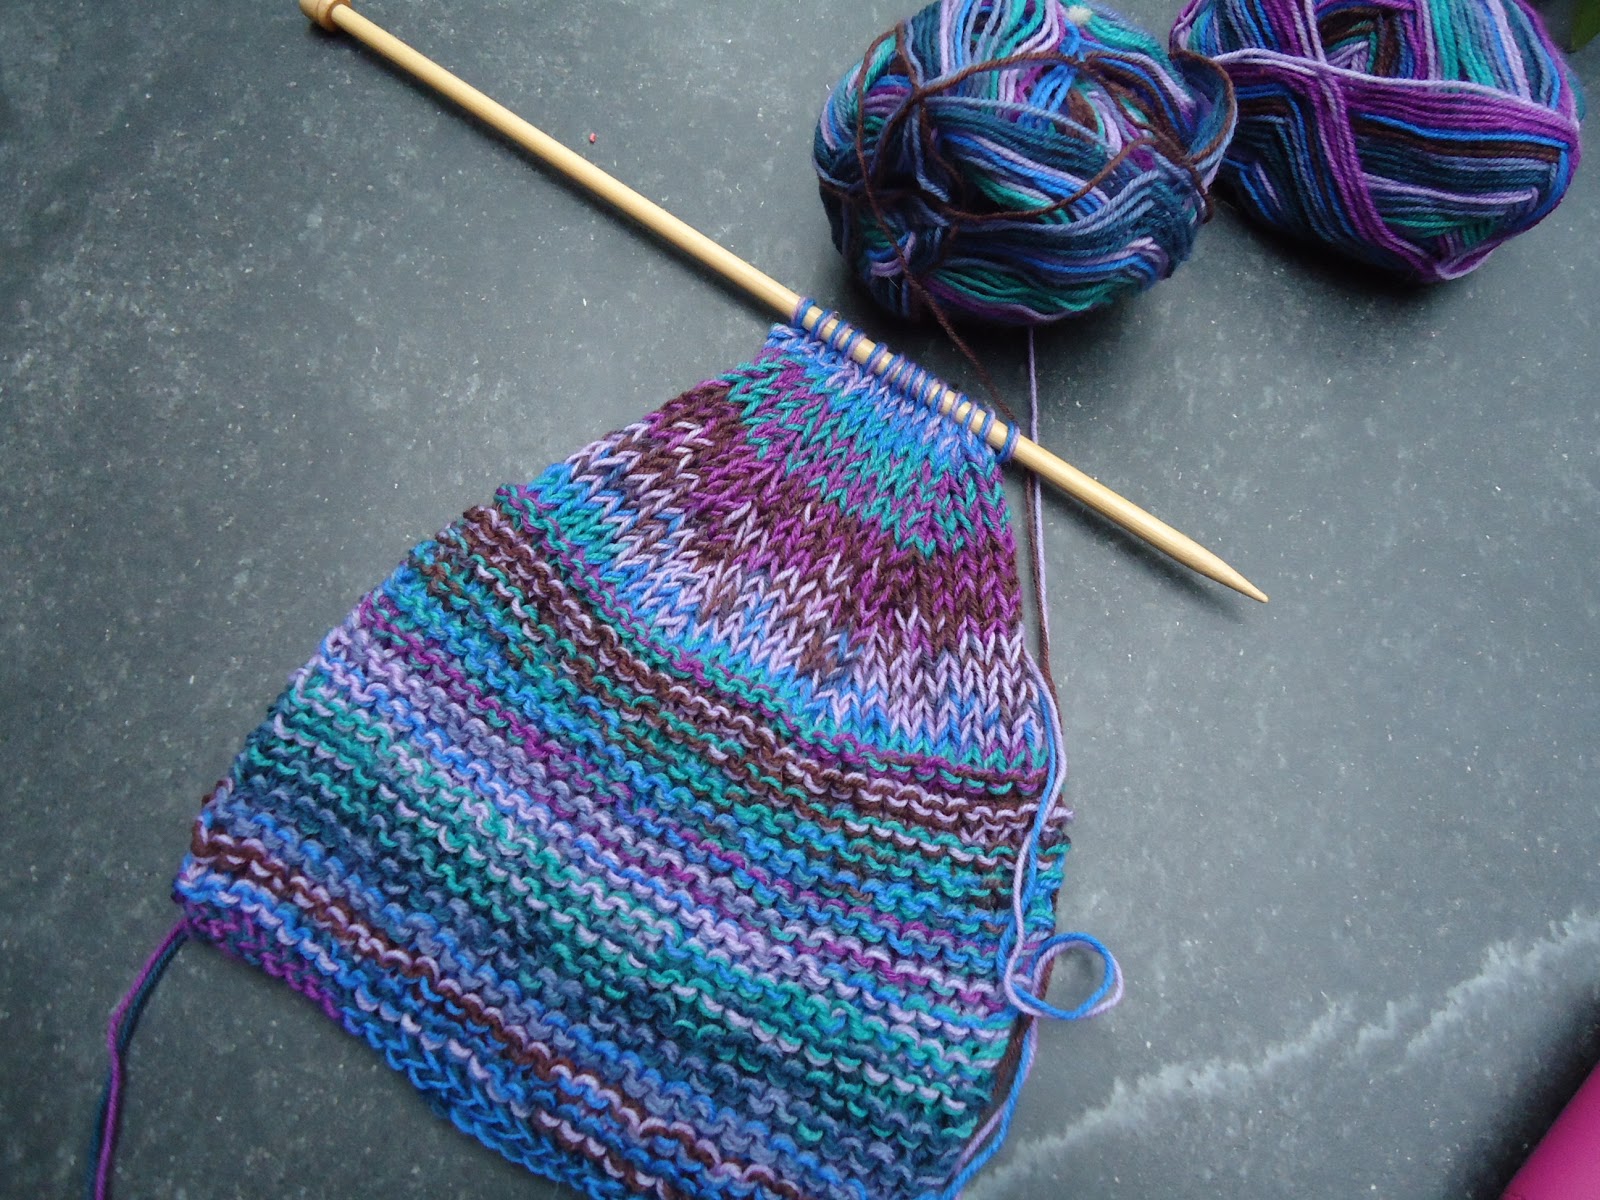
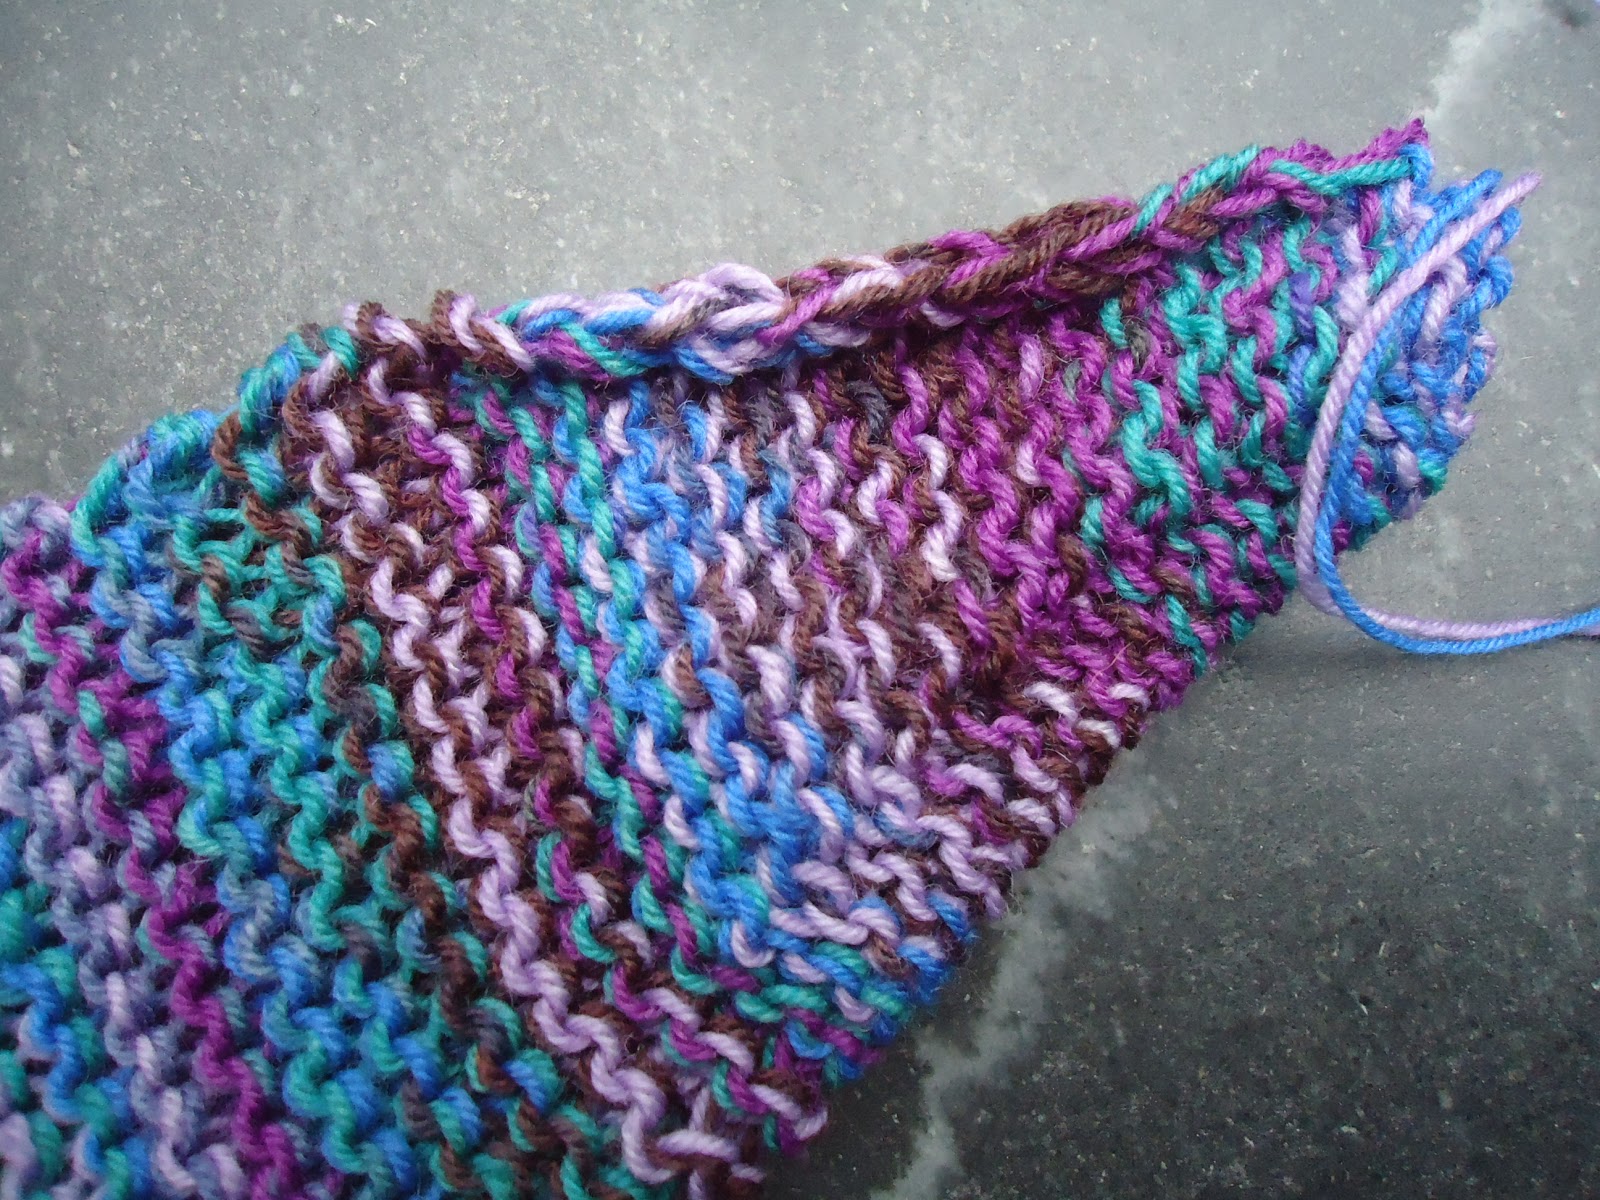
Hand knit cosy slippers
Based on a 1940s pattern


I have recently had new carpets and they are a very pale beige. Lots of my friends have been turning up in wet and soggy boots and I am keen that they leave them in the hall. One neighbour recently objected so much to removing her boots that she hasn't visited since. So ... I remember a Japanese friend always having a pile of knitted slippers in a basket in the hallway and we would all take off our shoes and boots and put some on. Apparently it is very rude and unacceptable to wear outdoor shoes inside a Japanese home. I decided to copy this idea with some homemade slippers in my hall.

Searching the net for simple knit slipper patterns, they all appear to be similar, and very quick and easy to knit. So I decided to design my own based on some of the simple designs I found on Ravelry.
For the sizing I measured my foot from toe to heel (9 inches) and detracted 1 inch as the knitted slipper will be stretchy (8 inches). I am a size 5.5/6.0 UK - and these fitted perfectly. The slipper can be made smaller or larger by decreasing or increasing the garter stitch rows, or by using different size needles and different gauge wools.

The materials were just what I had in my stash -

2 x 50 gram balls of multicoloured sock wool in 4 ply - to be used together
1 pair of size 7 mm needles
A darning needle

The Slipper - Make 2

Using both balls of wool at once and No 7 mm needles
Cast on 30 st
Knit first row into the back of the stitches
Knit 30 rows in garter stitch
(Approximately 5.5 inches)
Next row purl
K10, K 2 tog, K6, K2 tog, K10
Next row purl
K 9, K2 tog, K6, K2 tog, K9
Next row purl
K8, K2 tog, K6, K2 tog, K8
Next row purl
K7, K2 tog, K6, K2 tog, K7
Next row purl
K6, K2 tog, K6, K2 tog, K6
Next row purl
K5, K2 tog, K6, K2 tog, K5
Next row purl
K4, K2 tog, K6, K2 tog, K4
Next row purl
K3, K2 tog, K6, K2 tog, K3
Next row purl
(Approximately 2.5 inches)
Leaving 14 stitches on needle thread double strand through all stitches and draw tightly.

Sew the toes together until you reach the garter stitch area
Sew the back seam


The Bows - Make 2

Cast on 7 stitches using No 7 mm needles
Knit into back of stitches for first row
Knit 15 rows in garter stitch
Knit into back of stitches for last row
Cast off

The Ties - Make 2

Cast on 3 stitches using No 7 mm needles
Knit into back of stitches for first row
Knit 7 rows in garter stitch
Knit into back of stitches for last row
Cast off


Make up bows and attach to slippers


Sadly blogger is misbehaving and so the photos are not at all where they are supposed to be ... still I think they will give you a picture of just what I did - though not necessarily in that order!

NB. While I was making the slippers the bad cat puked on the carpet - so these were unable to save the carpet from stains!  Ggrrrr!


Yay! 

Tuesday, 12 February 2013

Knit Yourself A Necklace


A Kookie Project
Work In Progress


Recently at a craft market I saw a stall with some knitted and crochet necklaces. I thought they were extremely unusual and very pretty indeed. I would have actually bought one but was put off by the cheap and garish shiny silver coloured clasp. Having a close look I realised that they were merely strands of crochet and knitted strips twirled together - truly a 'neck lace' - I think that they may even take the place of a 'neck scarf' if sufficiently large and warm and soft.


Some pretty knitted necklaces


I then checked out the Internet for some tutorials and inspiration and realised that there was not just one way - in fact in the area of knitted and crochet necklaces then anything goes. Bearing this in mind I set to and developed my own. I settled on an overall length of 24 inches so that when joined (no garish clasp) it would both go over my head and be of a sufficient length not to be a choker.


Via agoodyarn.net


Via tumblr


Via flickr


Via patterni.net


I then collected a few yarns of different textures in shades of red with a few additional colours for accent. I like red!  I then set to knitting and crocheting several strands in different widths and designs in different yarns all approximately 24 inches long. I also knitted some small red roses for decoration.
I wanted a little sparkle in the necklace and decided on a few beads again for decoration. I then also interspersed a few coloured threads to give it a lift. These are a few of the knitted and crocheted threads to be collected into a necklace after the addition of beads and flowers ...


Now for some beads and then to twist and twine and assemble the necklace ...
Have you made any unusual necklaces?


I shall post a pic of the completed item later ...